Gionee M6 announced in July 2016. Out of the box, it comes with Android OS, v6.0 (Marshmallow), powered by the MT6755 (Mediatek Helio P10). The phone has a private space feature that is highly encrypted and can be locked with the owner's fingerprint, making it almost impossible for another person to unlock or view what is inside.
Gionee M6 is one of the most secure smartphones in the world and you may be thinking that rooting Gionee M6 is impossible, but when talking about the world of Technology, nothing is impossible. At last, rooting Gionee M6 and installing TWRP is now possible.
You will like to root your Gionee M6 Running on Android version 6.0, probably because you want to explore more, but the Android Marshmallow is very stubborn when it comes to rooting, because the popular and easiest apps such as Kingroot, Vroot, Framaroot, Tecnoroot, Rootgenius etc., not working for it. The below tutorial will guide the Tecno Gionee M6 users to Root their Smartphone.
Important Notice
After rooting your phone, it's advisable to unroot before performing an OTA update or restoring factoring settings. We have a comprehensive guide on that here.
Materials Needed For Rooting
» Charge your M6 to at least 50%
» USB Cable - for communication within the smartphone and PC.
» VCOM Drivers - Downloading link and installation instruction, check here
» SP Flash Tool - Download it Here
» SuperSU v2.78.zip - Download it Here
» Philz recovery .img for Gionee M6 ported by Team Hovatek - Download it Here
» Unzip the Philz recovery zip file that you downloaded and flash the recovery image to the phone using SP Flash Tool
How Can I Flash it Using SP Flashtool? Check out this link for the instruction: check here
» Now, boot your phone into TWRP Recovery Mode (by Holding the Vol Up and Power button simultaneously for 5 seconds)
» In Philz recovery, you use the Volume buttons to navigate and Power button to select
» Select Install Zip
» Navigate to the location of the SuperSU 2.78.zip and select it
» Swipe to confirm flashing of SuperSU.zip and wait till flashing is complete
» If you are prompted to fix root, select No
» After a successful flashing go back and reboot.

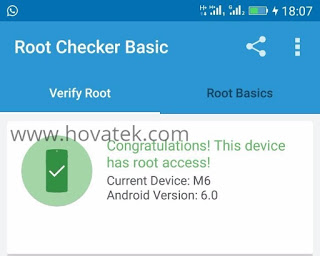
It is simple as that. You may download Root Checker from Play Store to verify your root privileges. After downloading, simply Install Root Checker, run it and you should get a success message after then.
Gionee M6 is one of the most secure smartphones in the world and you may be thinking that rooting Gionee M6 is impossible, but when talking about the world of Technology, nothing is impossible. At last, rooting Gionee M6 and installing TWRP is now possible.
You will like to root your Gionee M6 Running on Android version 6.0, probably because you want to explore more, but the Android Marshmallow is very stubborn when it comes to rooting, because the popular and easiest apps such as Kingroot, Vroot, Framaroot, Tecnoroot, Rootgenius etc., not working for it. The below tutorial will guide the Tecno Gionee M6 users to Root their Smartphone.
Important Notice
After rooting your phone, it's advisable to unroot before performing an OTA update or restoring factoring settings. We have a comprehensive guide on that here.
Materials Needed For Rooting
» Charge your M6 to at least 50%
» USB Cable - for communication within the smartphone and PC.
» VCOM Drivers - Downloading link and installation instruction, check here
» SP Flash Tool - Download it Here
» SuperSU v2.78.zip - Download it Here
» Philz recovery .img for Gionee M6 ported by Team Hovatek - Download it Here
How to Install TWRP Recovery and Root Gionee M6
» Save the SuperSU 2.78.zip that you downloaded to your phone's SD card » Unzip the Philz recovery zip file that you downloaded and flash the recovery image to the phone using SP Flash Tool
How Can I Flash it Using SP Flashtool? Check out this link for the instruction: check here
» Now, boot your phone into TWRP Recovery Mode (by Holding the Vol Up and Power button simultaneously for 5 seconds)
» In Philz recovery, you use the Volume buttons to navigate and Power button to select
» Select Install Zip
» Navigate to the location of the SuperSU 2.78.zip and select it
» Swipe to confirm flashing of SuperSU.zip and wait till flashing is complete
» If you are prompted to fix root, select No
» After a successful flashing go back and reboot.

It is simple as that. You may download Root Checker from Play Store to verify your root privileges. After downloading, simply Install Root Checker, run it and you should get a success message after then.


No comments:
Post a Comment